Code Agent user guide
1. Background and goals
Through the Generic Code Agent template, users can quickly create a code-based intelligent agent (Code Agent) while completing both agent capability configuration and interactive interface (Agent UI) setup.
With AgenticHub, you can create intelligent assistants with Code / Article Generator Agent capabilities without writing code from scratch, significantly improving development and usage efficiency.
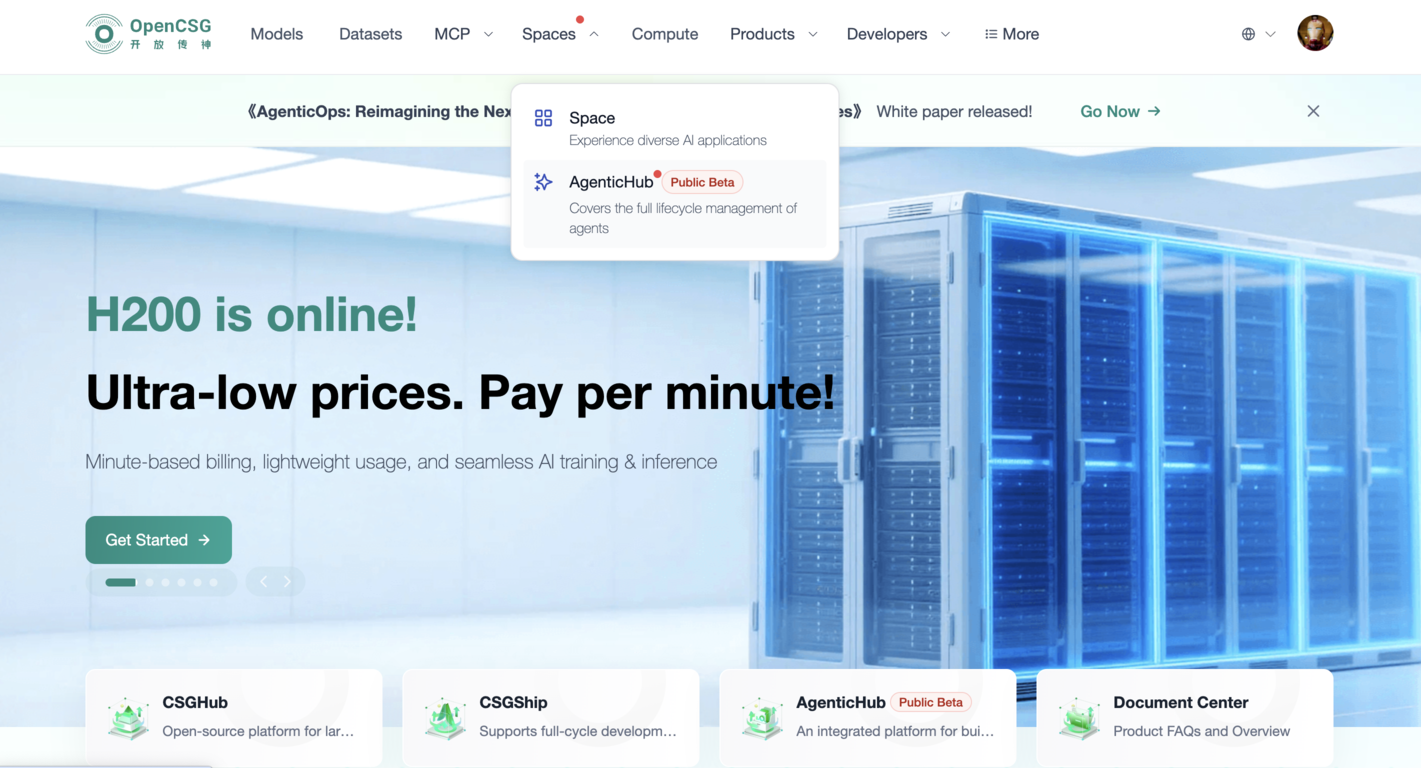
2. Accessing AgenticHub
Operation Steps:
- Log in to the Transn / OpenCSG community
- In the top bar open Apps → AgenticHub
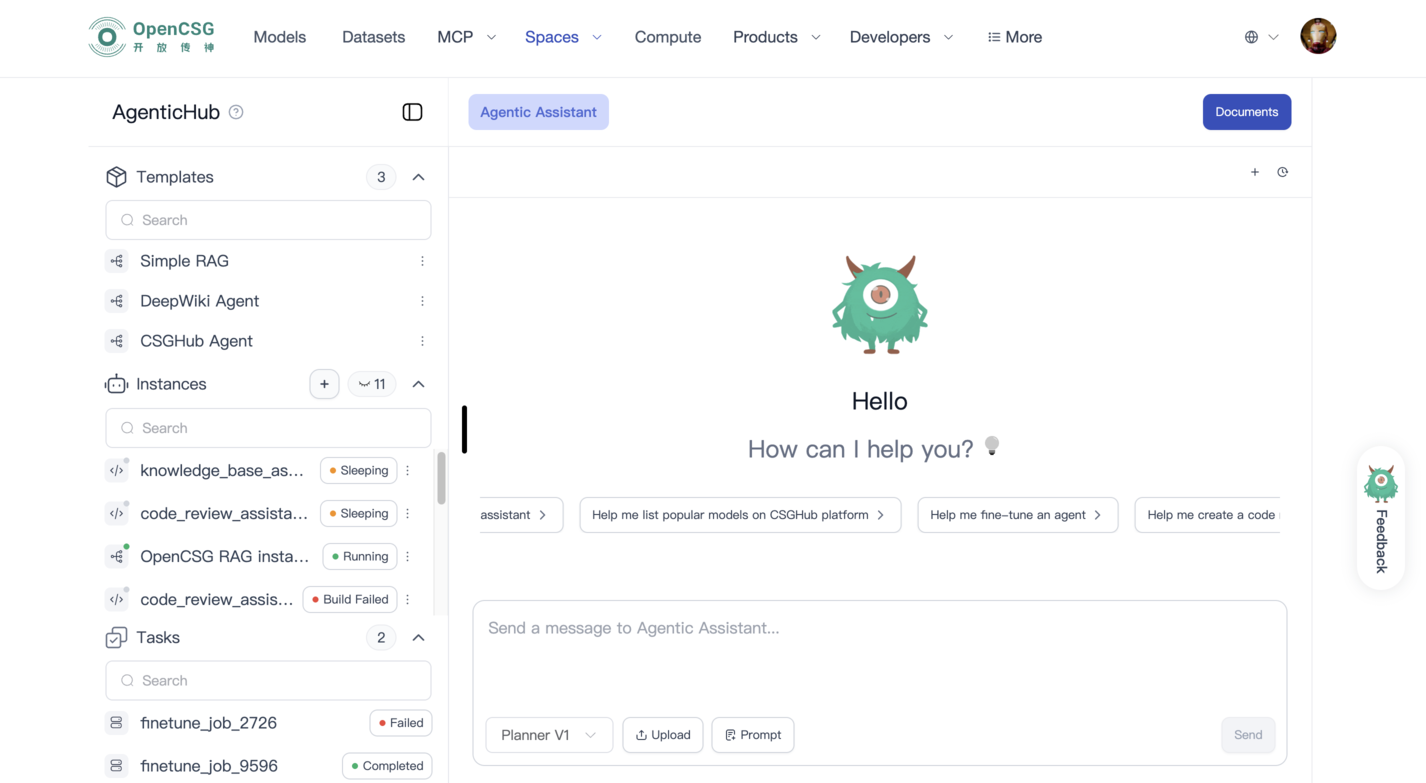
- After entering the AgenticHub workspace, you can see:
- Left side: Templates / Instances / Tasks / Resources
- Right side: Agent configuration and interaction area
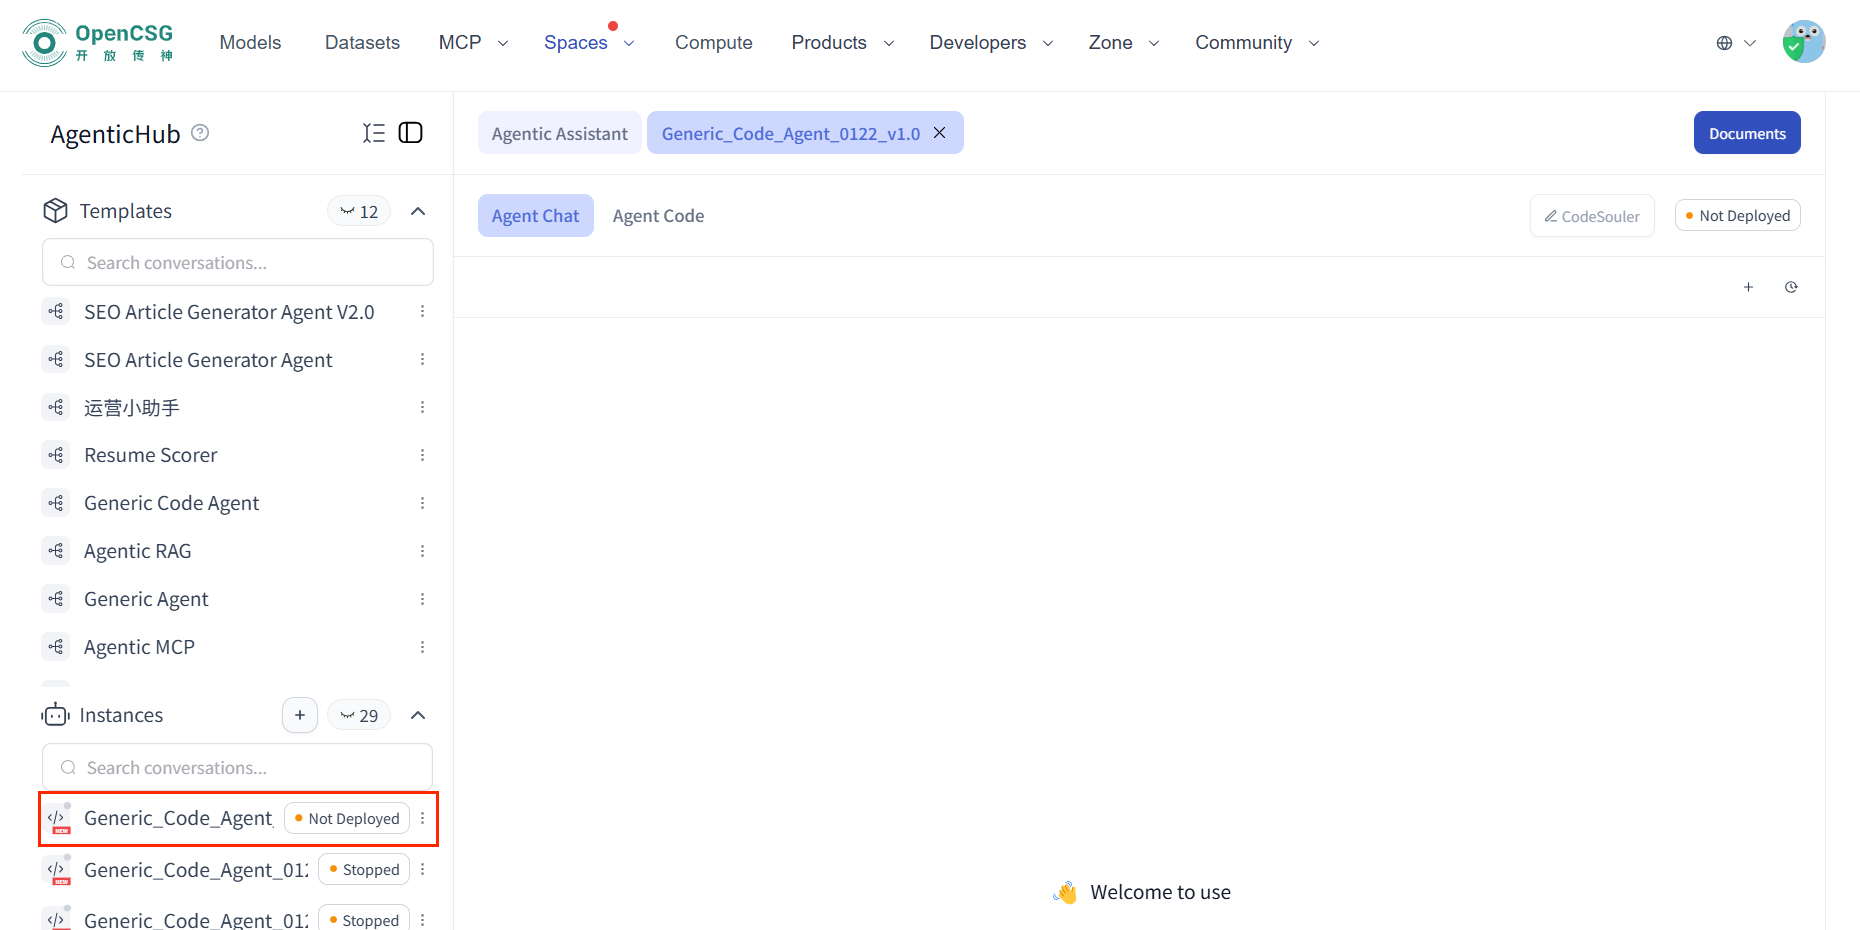
3. Create a Code Agent instance from a template
The platform provides a standard Generic_Code_Agent template for quickly creating code agents.
Operation Steps:
- Open the left-side Templates list
- Select the Generic_Code_Agent template
- Click Run on the right side of the template
- Fill in:
- Instance name
- Instance description
- Select and configure in order:
- Model
- Knowledge Base
- Tools / MCP
- Prompt
- UI (default UI or custom UI)
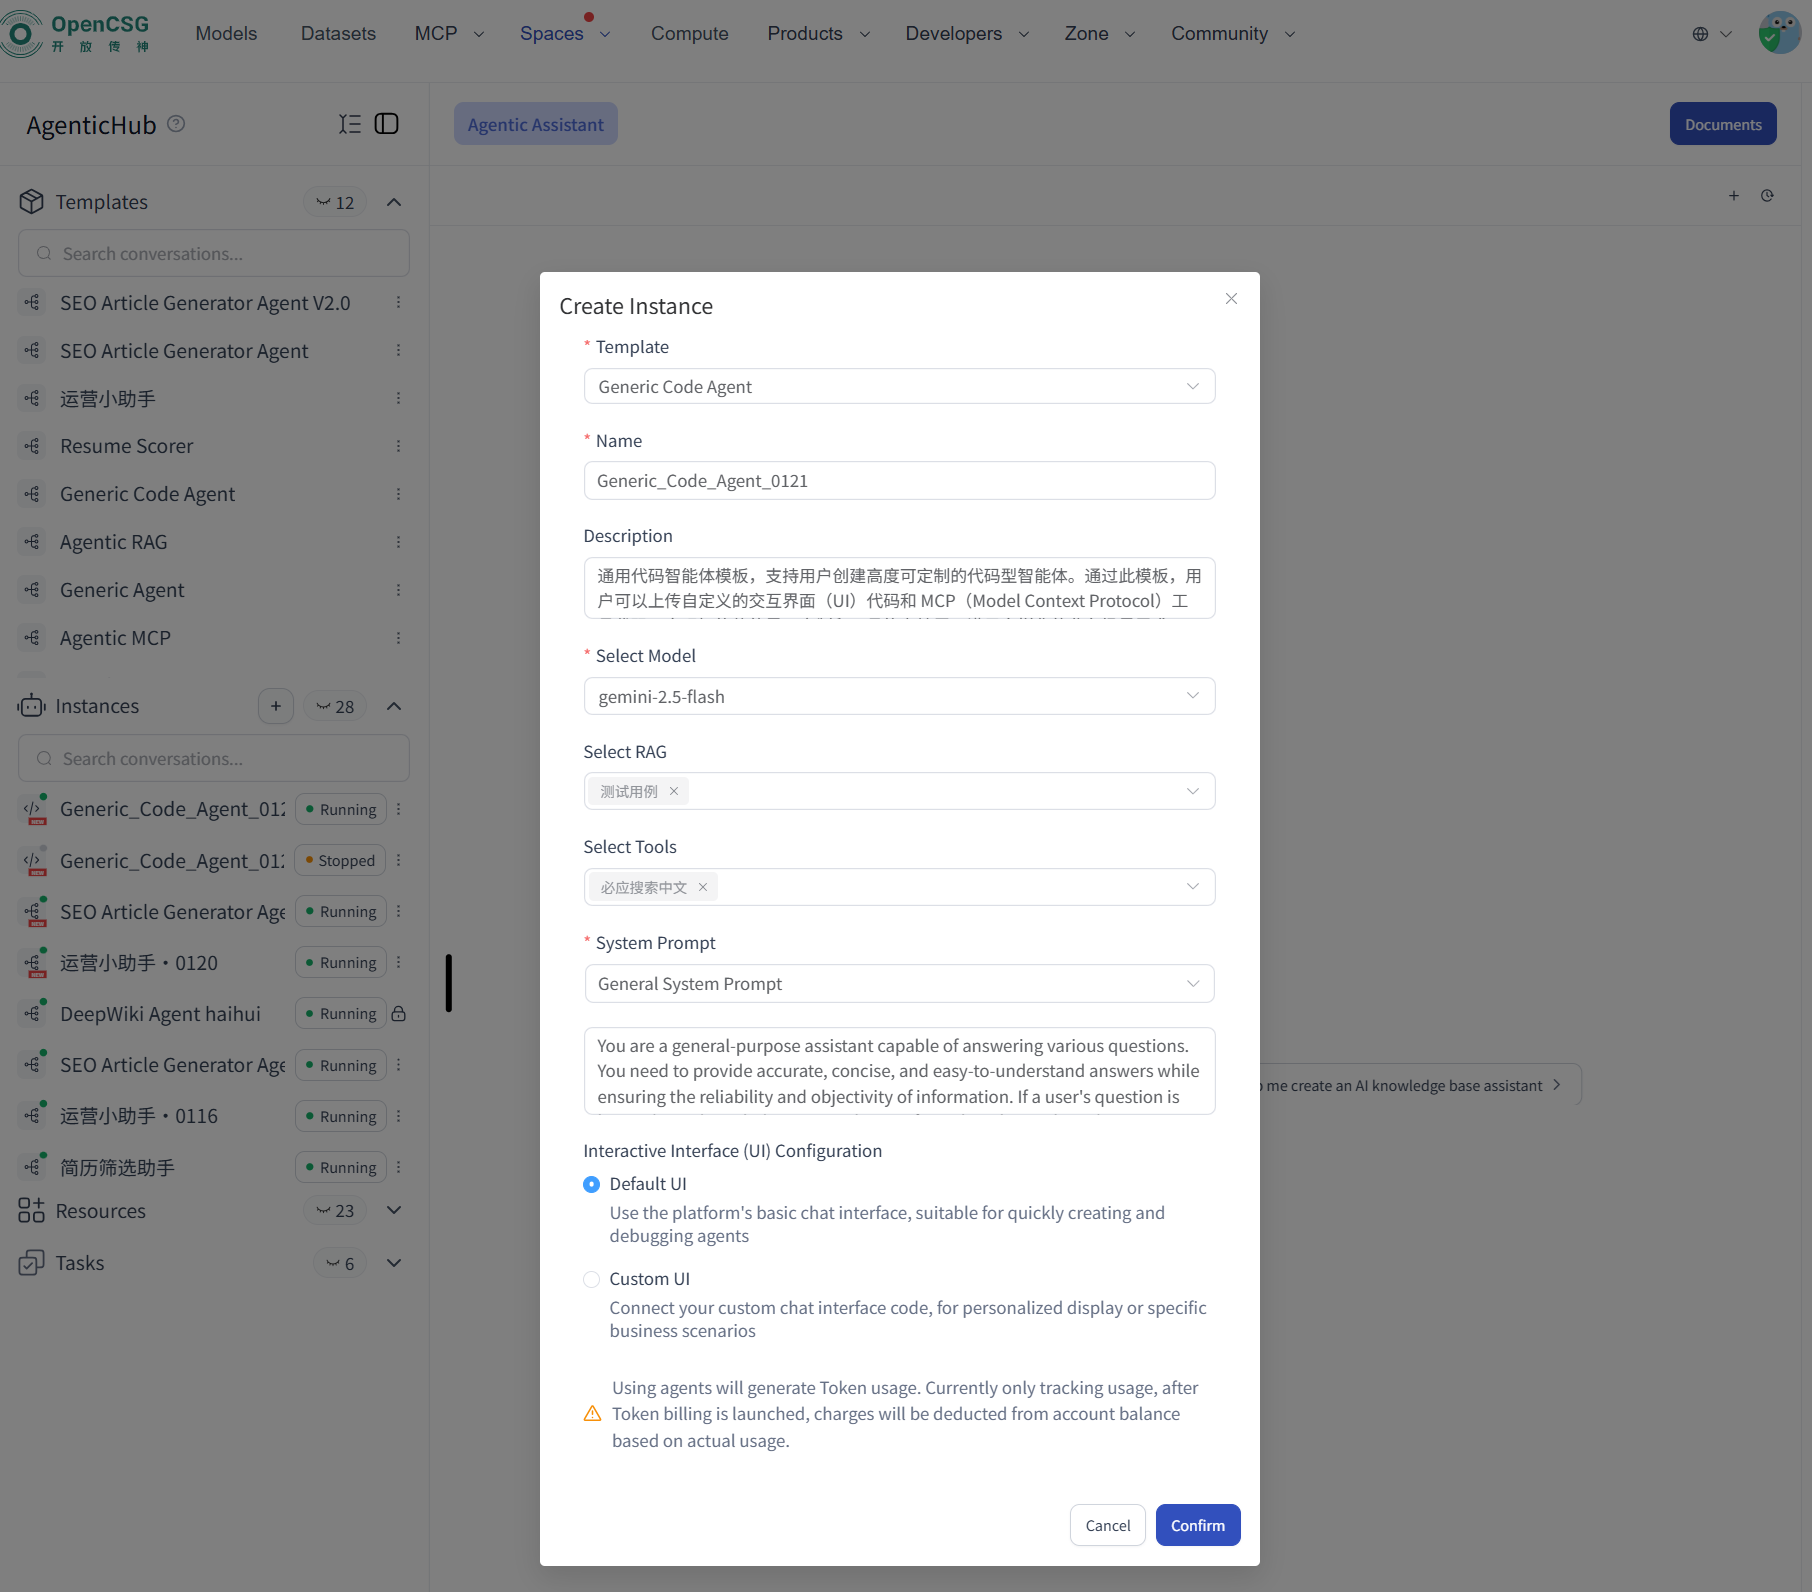
- After creation is complete, the instance will appear in the Instances list
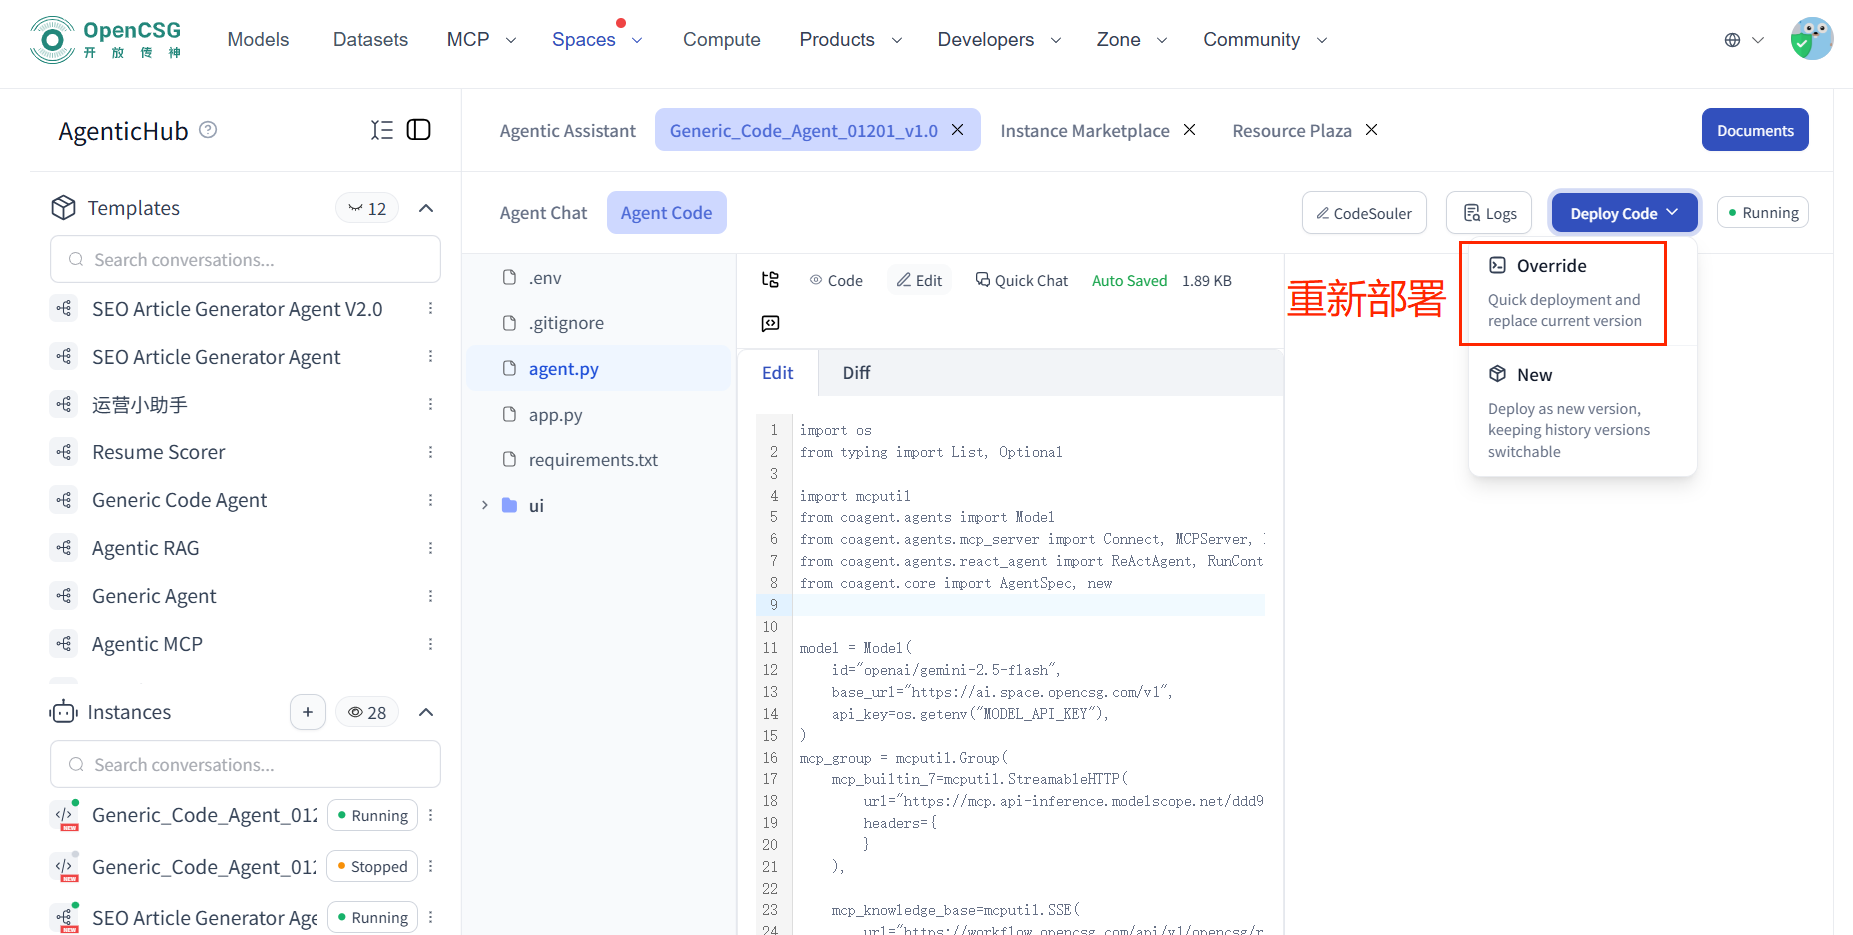
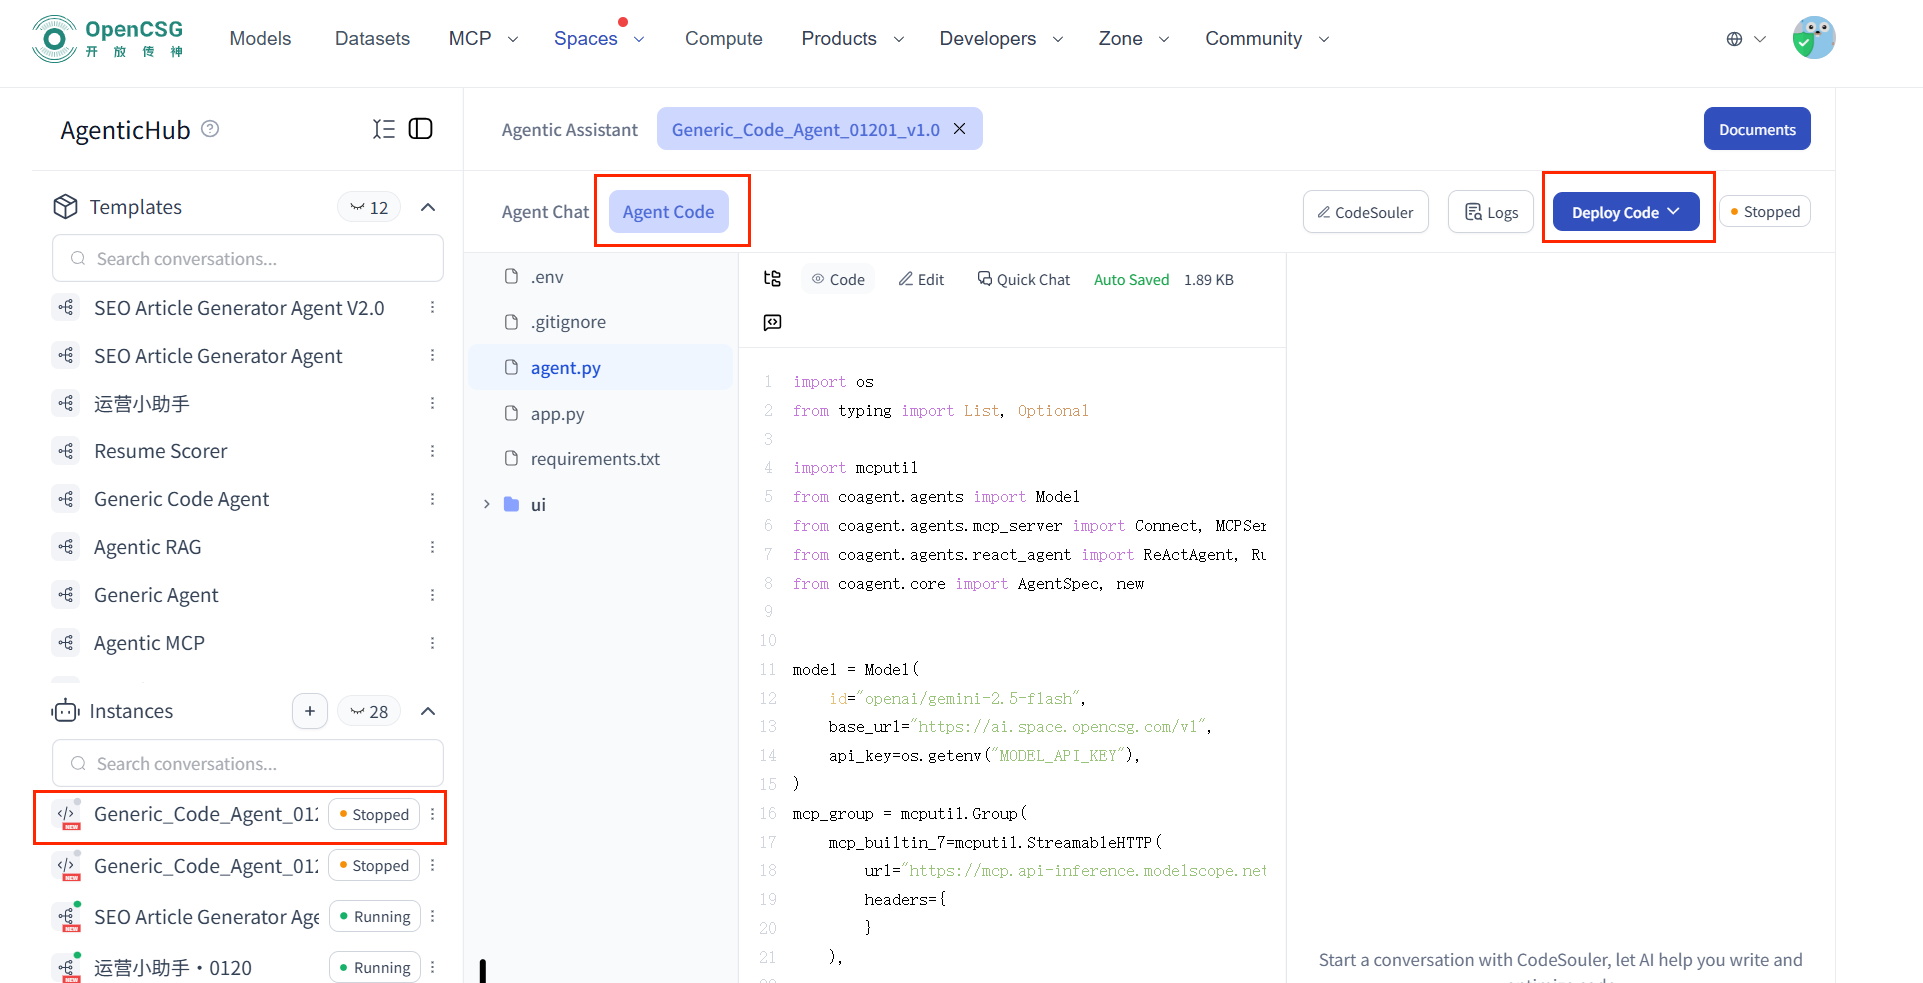
4. Deploy the Code Agent instance
After creation, you need to deploy the code instance for the agent to run.
Operation Steps:
- Open the left-side Instances list
- Click on the target code instance
- After entering the instance details, click Agent Code
- Click Deploy Code
- After successful deployment:
- The instance status will show as Running in Instances
- The instance status will show as Running in Instances
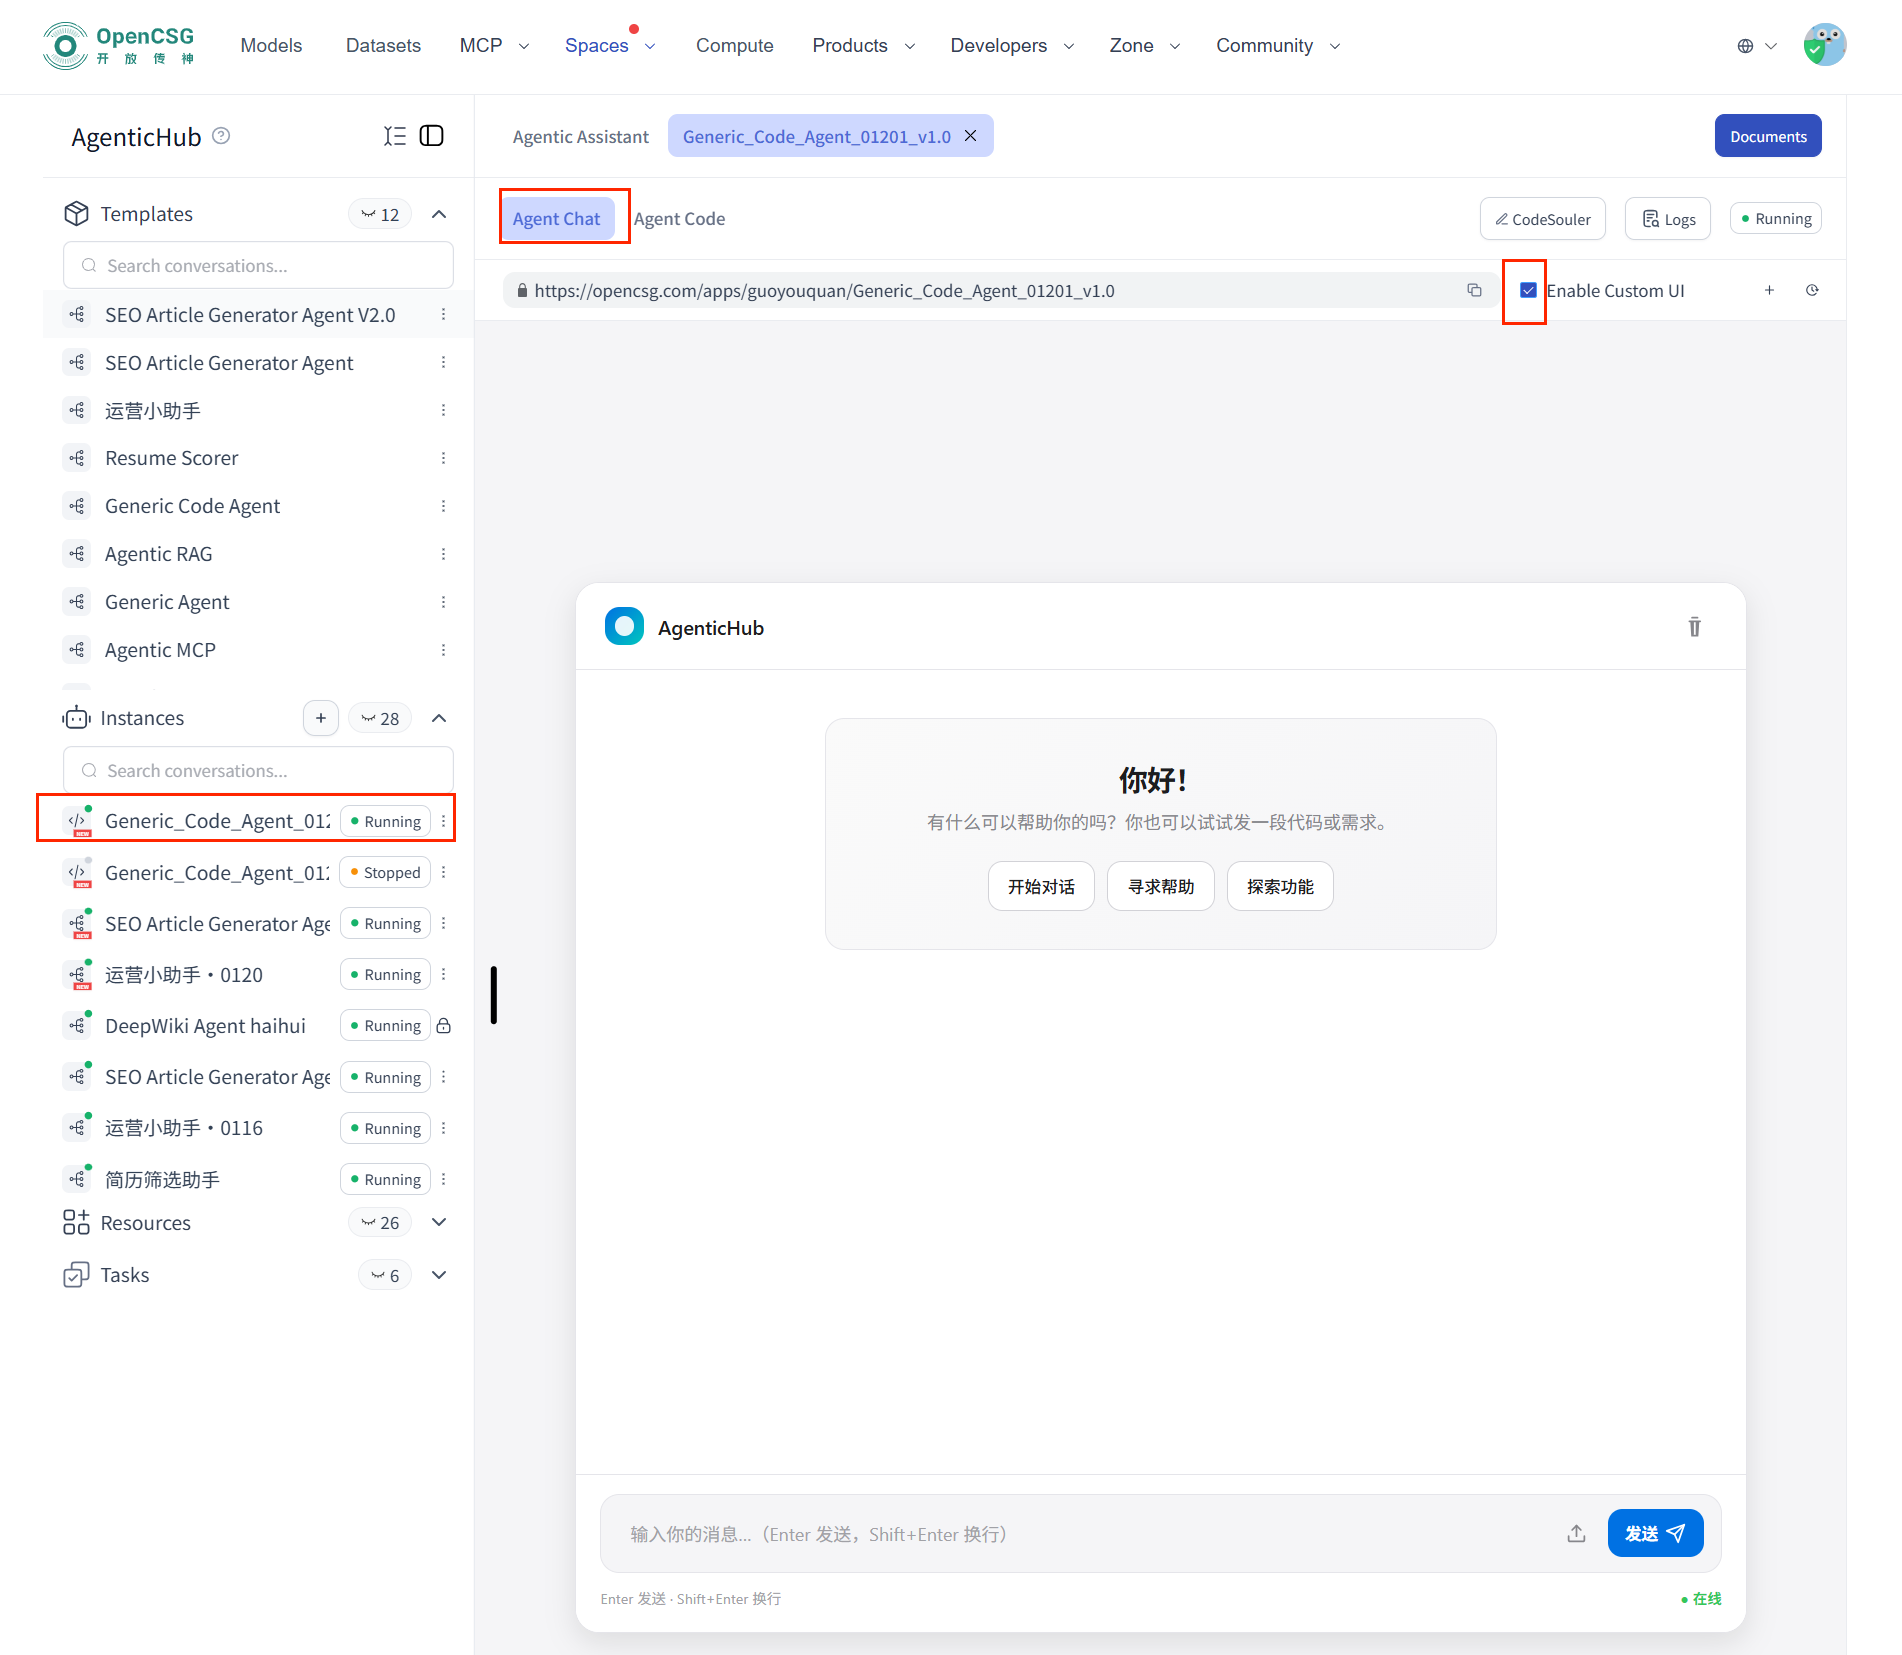
5. Enable the Code Agent UI
After deployment is complete, you can enable and access the agent's interactive UI.
Operation Steps:
- Open the left-side Instances list
- Click on the target code instance
- Click Agent Conversation
- Check Enable Custom UI (or use the default UI)
- The system will automatically open and display the Agent UI page
6. Resource lists (models / tools / knowledge / prompts)
AgenticHub provides a unified resource management entry.
Operation Steps:
- Open the left-side Resources list
- By default, it displays the Tools list
- Click on different resources to view:
- Knowledge Base → Knowledge Base list
- Models → Models list
- Prompts → Prompts list
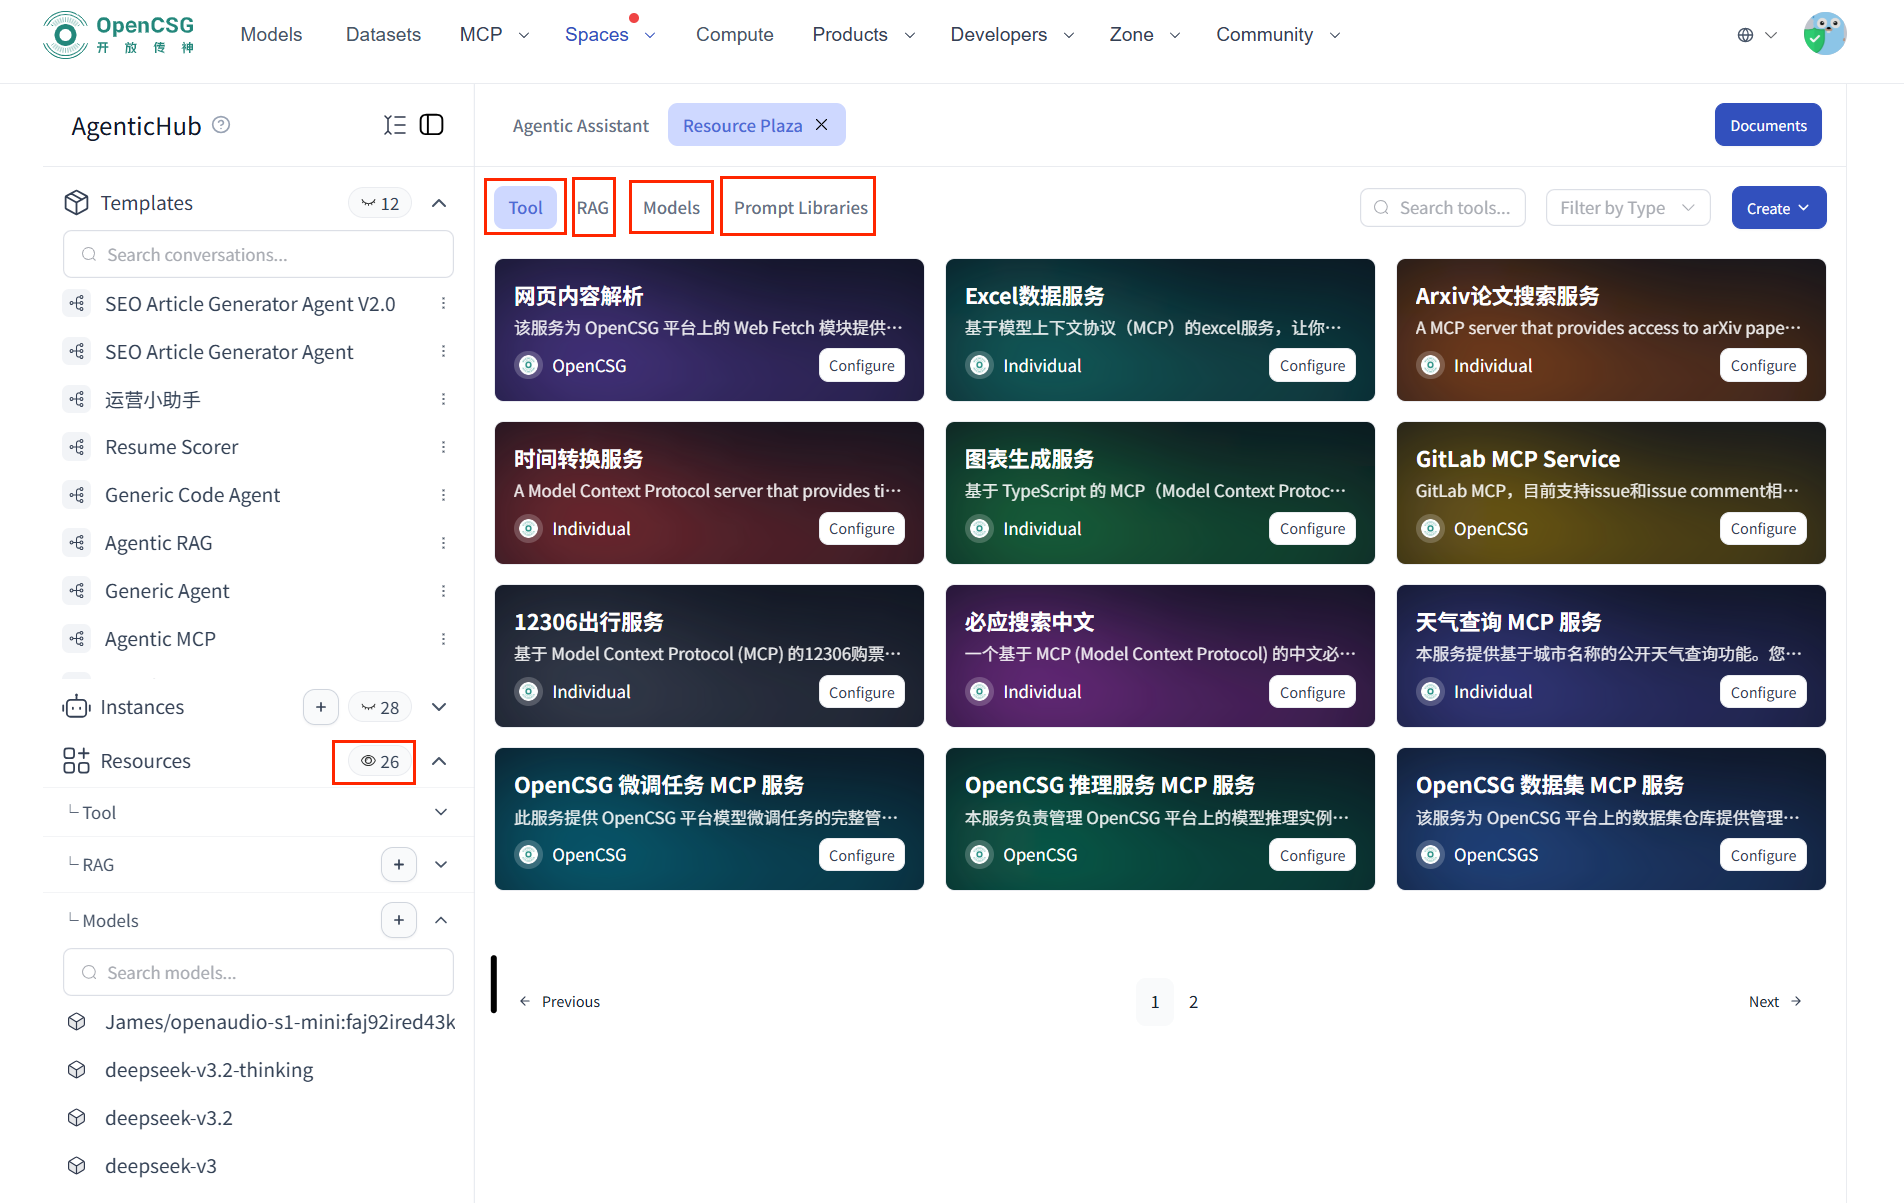
- In the Tools list:
- Click on any tool configuration
- You can view and edit the corresponding MCP Server configuration information

7. Update model / tools / knowledge / prompts (advanced)
When you need to modify agent capabilities, you can directly edit the code and redeploy.
7.1 Entering the Code Editing Page
Operation Steps:
- Open the left-side Instances list
- Click on the target code instance
- Click Agent Code
- Click Edit
- Open
agent.py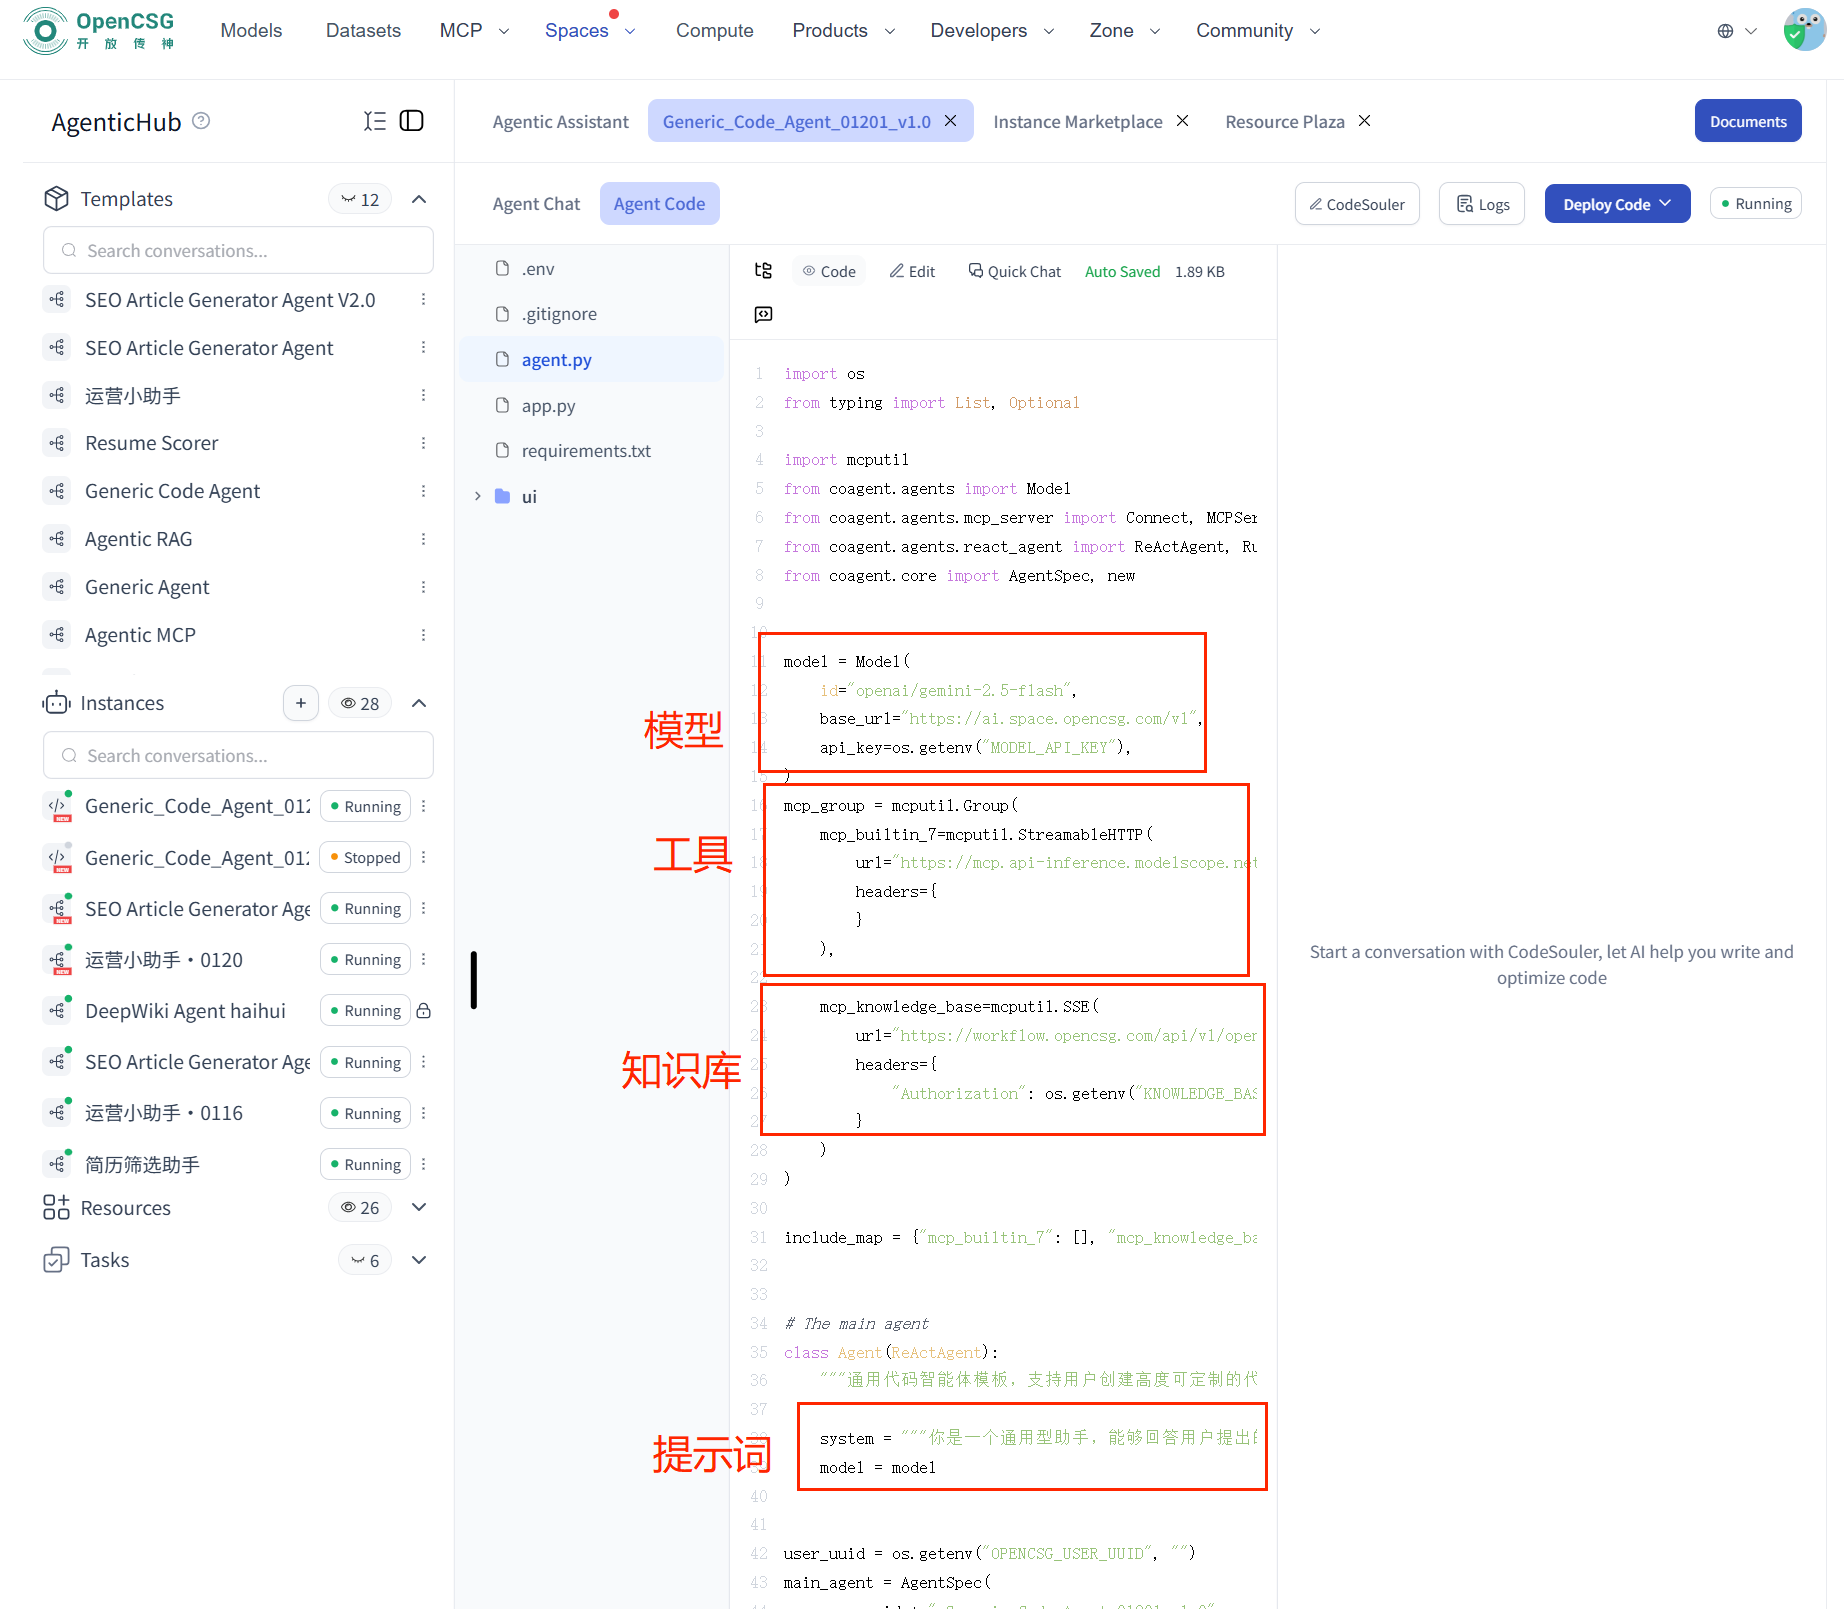
7.2 Updating the Model
In agent.py, the model variable is used to configure the model:
model = Model(
    id="openai/deepseek-v3",
    base_url="https://aigateway.opencsg-stg.com/v1",
    api_key=os.getenv("MODEL_API_KEY"),
)
Explanation:
- Change the model by modifying the id attribute (when using platform models, you need to add the openai/ prefix)
7.3 Updating Tools (MCP) and Knowledge Base
In the code:
mcp_group: Tool configurationmcp_knowledge_base: Knowledge Base configuration
mcp_group = mcputil.Group(
    # Weather query MCP service
    mcp_builtin_8=mcputil.StreamableHTTP(
        url="https://u-wanghh2003-free-weather-mcp-jn.public.opencsg-stg.com/mcp",
        headers={},
    ),
    # Knowledge Base MCP service
    mcp_knowledge_base=mcputil.SSE(
        url="https://agenthub.opencsg-stg.com:7861/api/v1/opencsg/rag/sse",
        headers={
            "Authorization": os.getenv("KNOWLEDGE_BASE_AUTHORIZATION")
        },
    ),
)
Explanation:
-
Some MCPs require manual configuration of headers in the resource square, for example, gitlab mcp service requires configuration of personal token and gitlab domain name
-
The information in headers is written in the project's .env file and needs to be added synchronously in the .env file
7.4 Updating Prompts
In the code, the system variable is the system prompt:
system = """
You are a data analysis expert specialized in generating insights from complex datasets.
"""
Modifying this content will update the agent's behavior and role settings.
7.5 Redeploying the Code
After making any of the following modifications:
- Model
- Tools (MCP)
- Knowledge Base
- Prompts
You need to perform the following steps:
- Save the code
- Click Redeploy Code
- The modifications will take effect after successful deployment