GitLab token configuration
This guide explains how to create a GitLab Personal Access Token and register it in AgenticHub under API authentication, so agents and features can call the GitLab API against your instance.
Overview
| Phase | Steps | What you do |
|---|---|---|
| GitLab | 1–2 | Open User Settings → Access Tokens |
| GitLab | 3–6 | Add a token, pick scopes, copy it immediately (shown only once) |
| AgenticHub | 7–9 | Tools → API authentication, add GitLab with URL + token |
Part 1: Create a token in GitLab
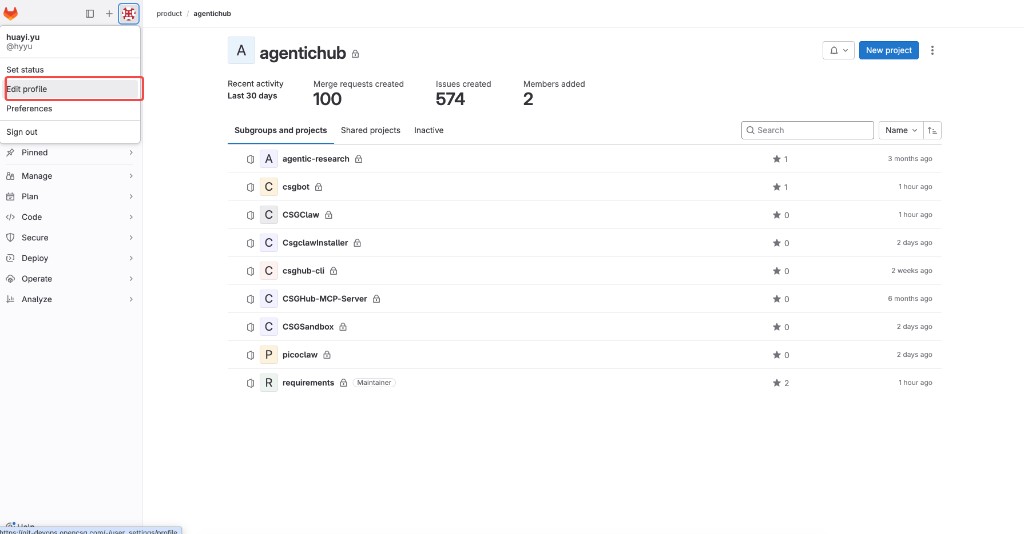
Step 1: Open profile settings
- Sign in to GitLab.
- Click your avatar / username (top left) and choose Edit profile (on some versions you may open Preferences first, then the token page from the sidebar).
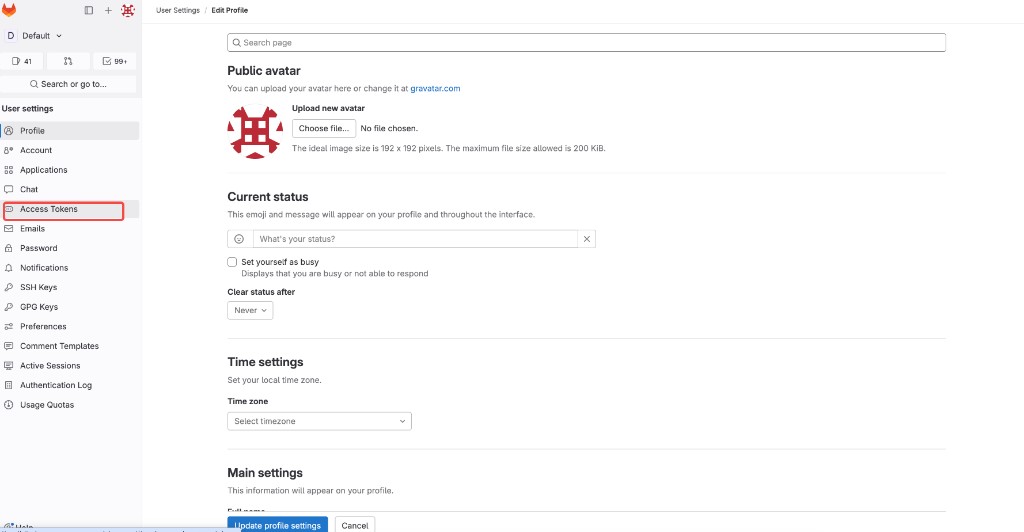
Step 2: Open Access Tokens
In the left sidebar under User settings, click Access Tokens.
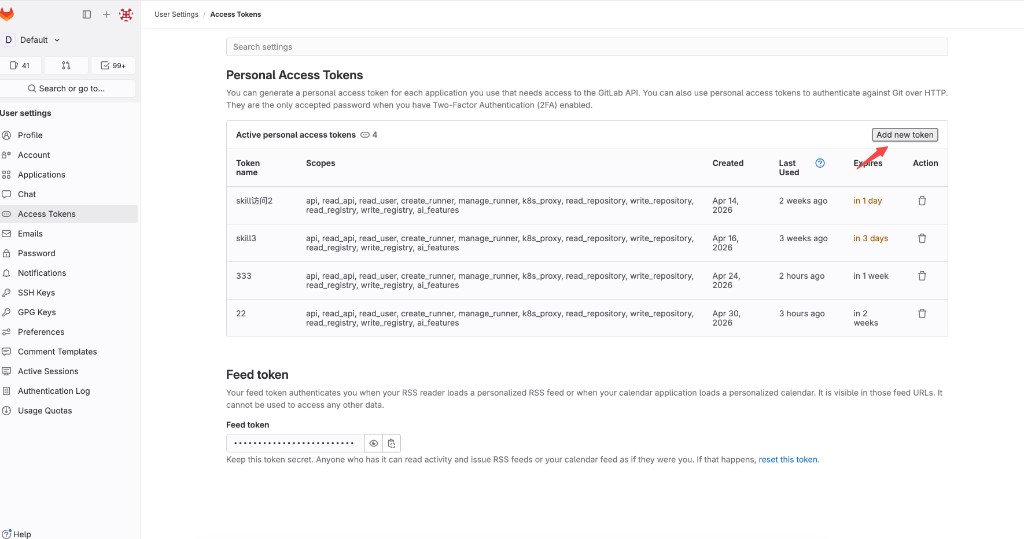
Step 3: Add a new token
On the Personal Access Tokens page, click Add new token (top right of the active tokens section).
Step 4: Name and expiration
In Add a personal access token:
- Token name: A short label (e.g.
agentichub-read). - Expiration date: Choose an expiry; renew and update AgenticHub before it lapses.
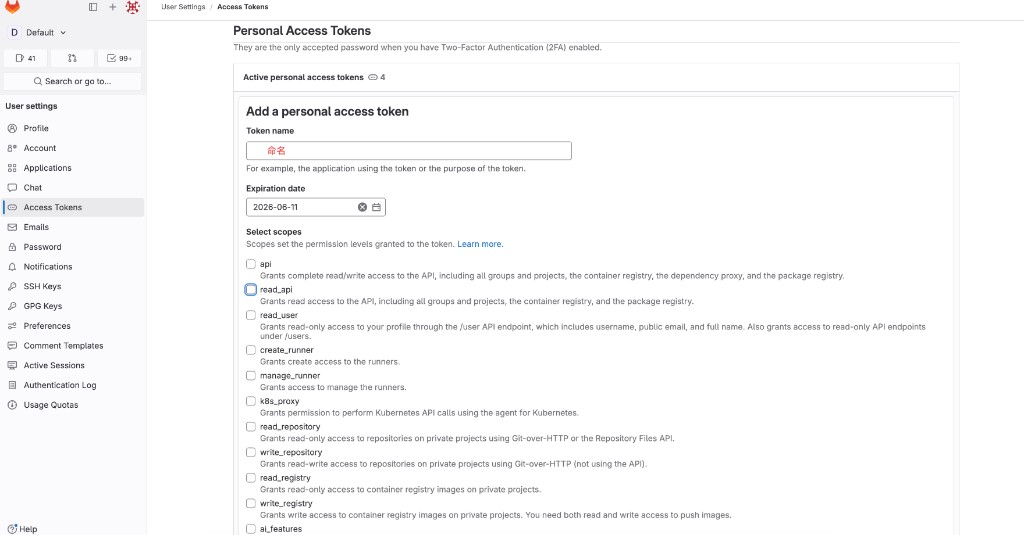
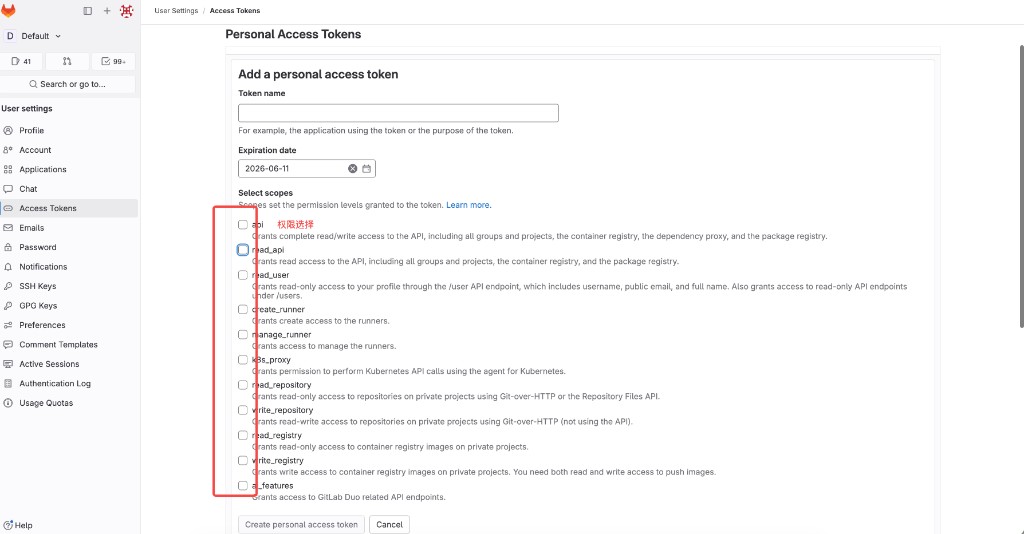
Step 5: Select scopes
Under Select scopes, enable the permissions you need.
- For example, enable
read_apifor read-only API access (groups, projects, container/package registries, etc.) when you only need metadata via the API. - For clone/push or broader access, add
read_repository,write_repository, and others as needed, following least privilege.
Click Create personal access token.
Step 6: Copy and store the token
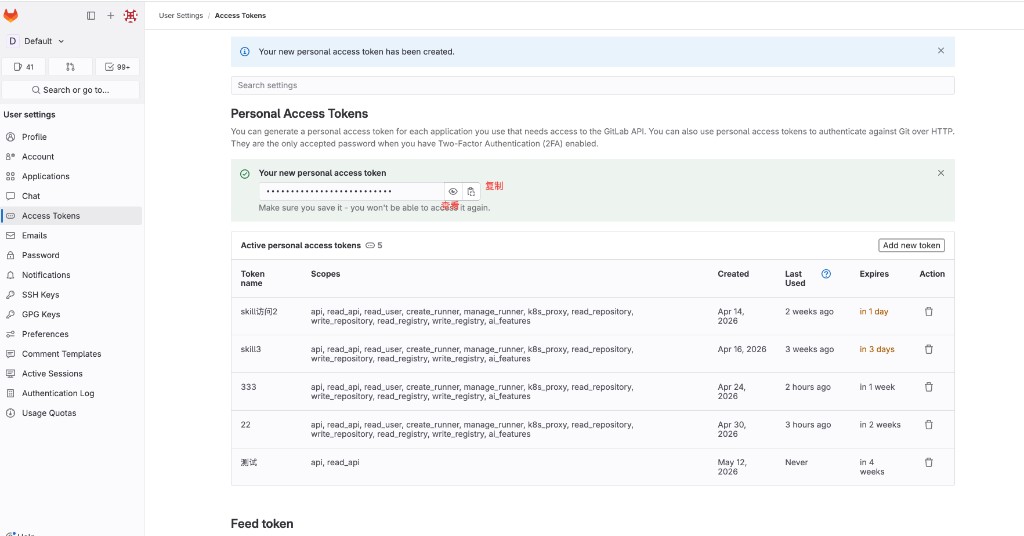
After creation, GitLab shows Your new personal access token and warns that you cannot see it again after leaving the page.
- Use the eye icon to reveal the token.
- Use the copy icon to copy it to the clipboard and store it safely.
Part 2: Configure AgenticHub
Sign in to AgenticHub and open the chat workspace.
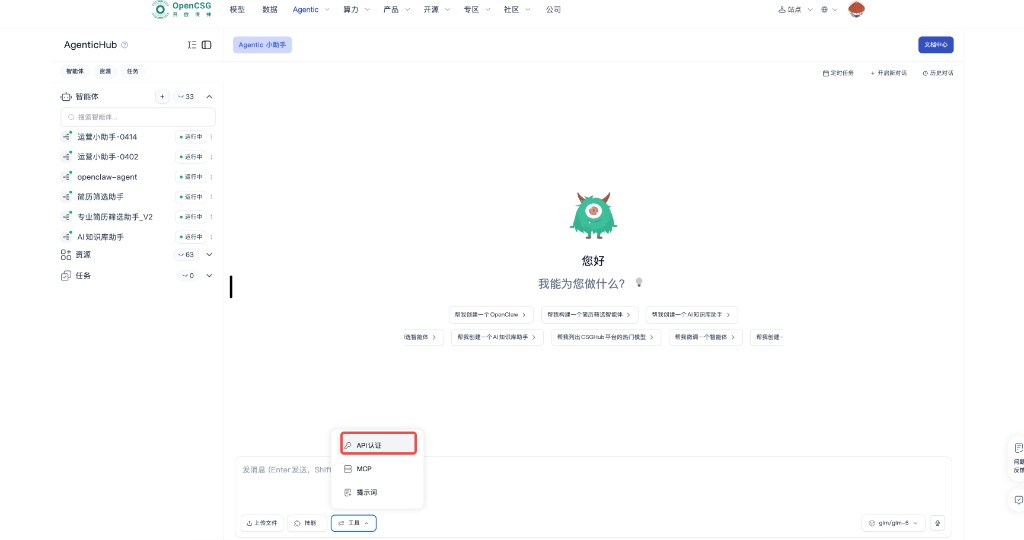
Step 7: Open API authentication
Next to the composer, open Tools and choose API authentication (wording may match your UI locale).
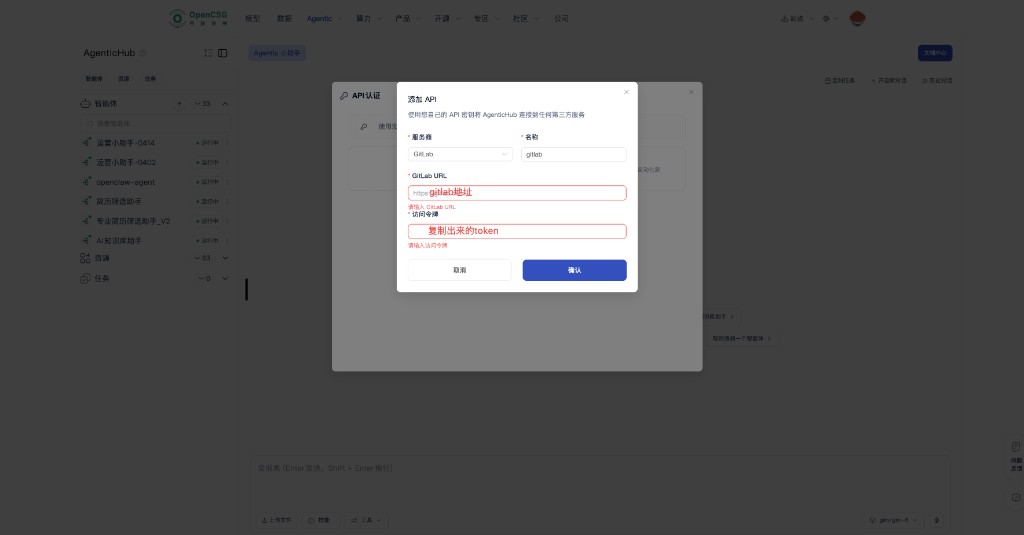
Step 8: Add GitLab
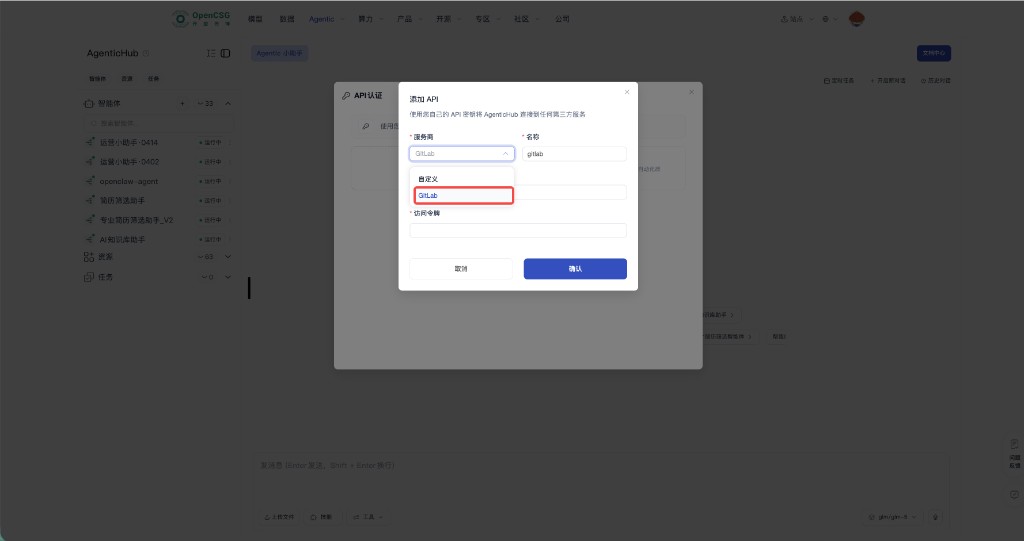
In Add API:
- Provider: GitLab.
- Name: A display name (e.g.
gitlab). - Access token: Paste the token from Step 6.
If the dialog only lists provider, name, and token at first, confirm to continue; a GitLab URL field may appear afterward (see Step 9).
Step 9: GitLab URL, token, and save
When GitLab URL (or equivalent) is shown:
- Enter the root URL of your GitLab instance, e.g.
https://gitlab.comorhttps://gitlab.company.example(no extra path). - Paste the Personal Access Token into Access token.
Click Confirm to save.
Tips
- Token leaks: Revoke the token in GitLab and mint a new one if it is exposed.
- 403 / insufficient access: Adjust scopes or create a new token with the minimum extra permissions required.
- Self-managed GitLab: Use the same scheme + host you use in the browser; ensure TLS trusts match your environment.