Organization
Create Organization
Login CSGHub, click on New Organization in the top right corner to create new organization.
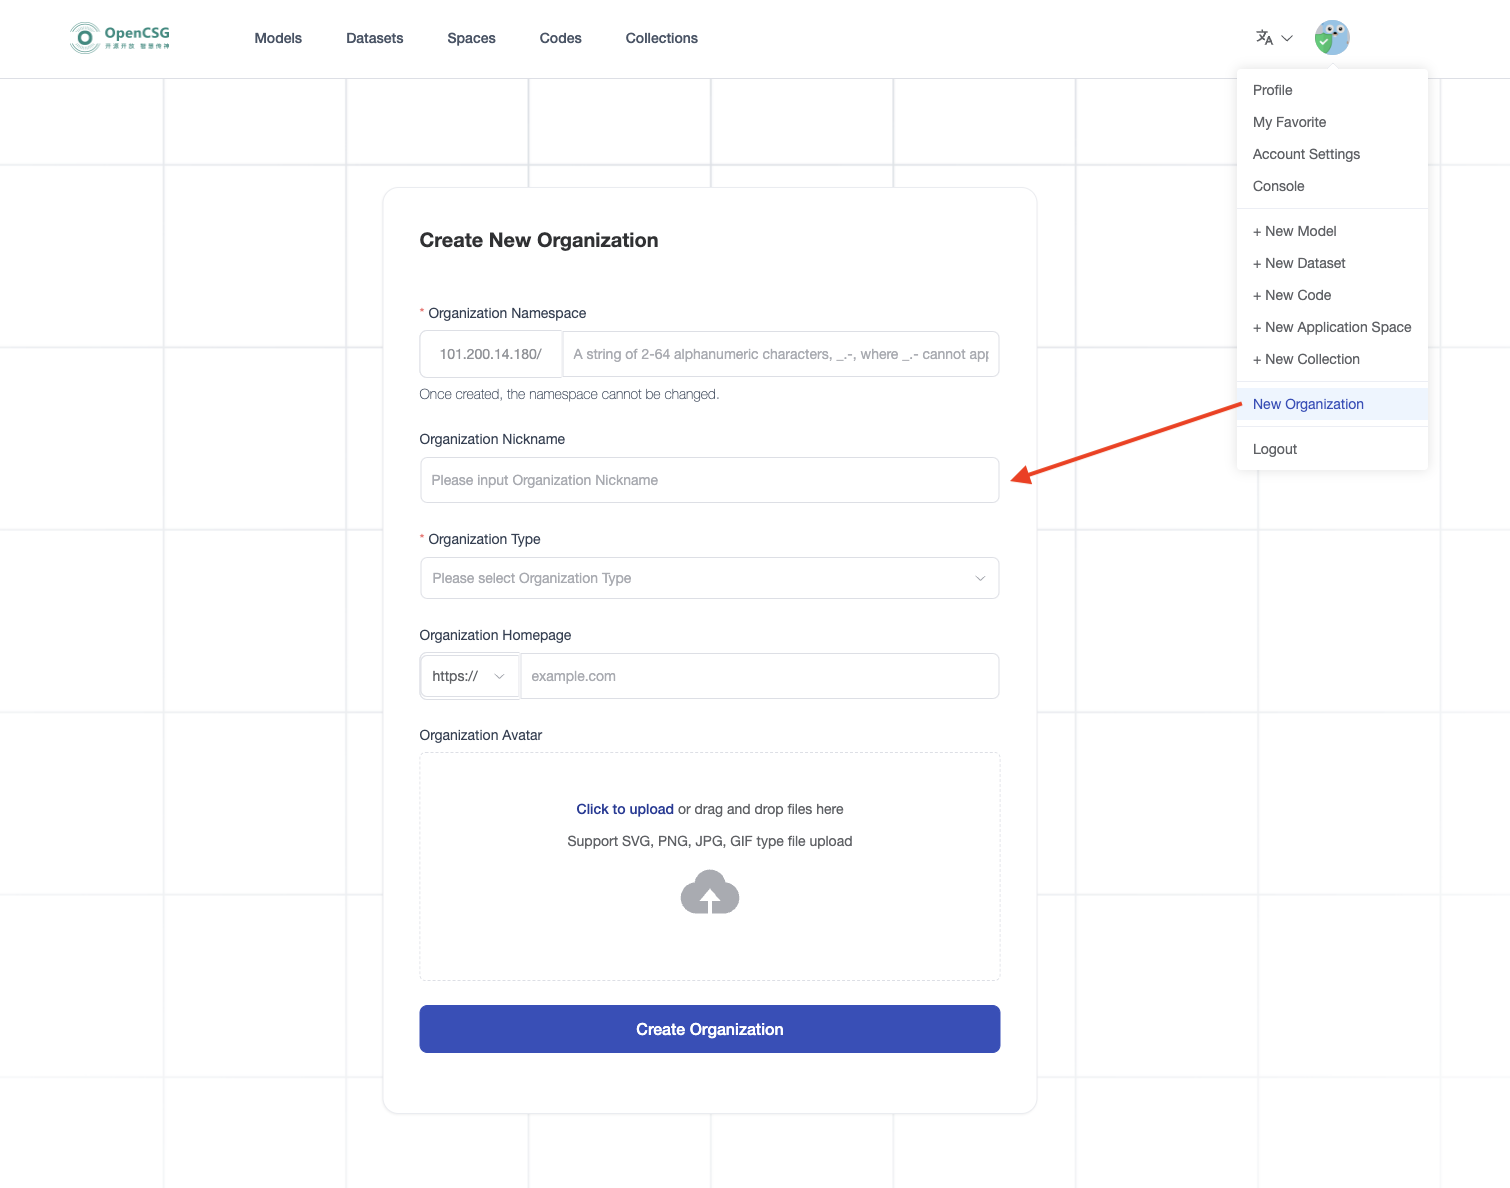
In the organization creation page, fill in the following information, and then click the Create Organization.
- Organizaiton namespace, organization nickname.
- Upload organization avatar.
- Select organization type.
- Organization homepage.
View Joined Organization
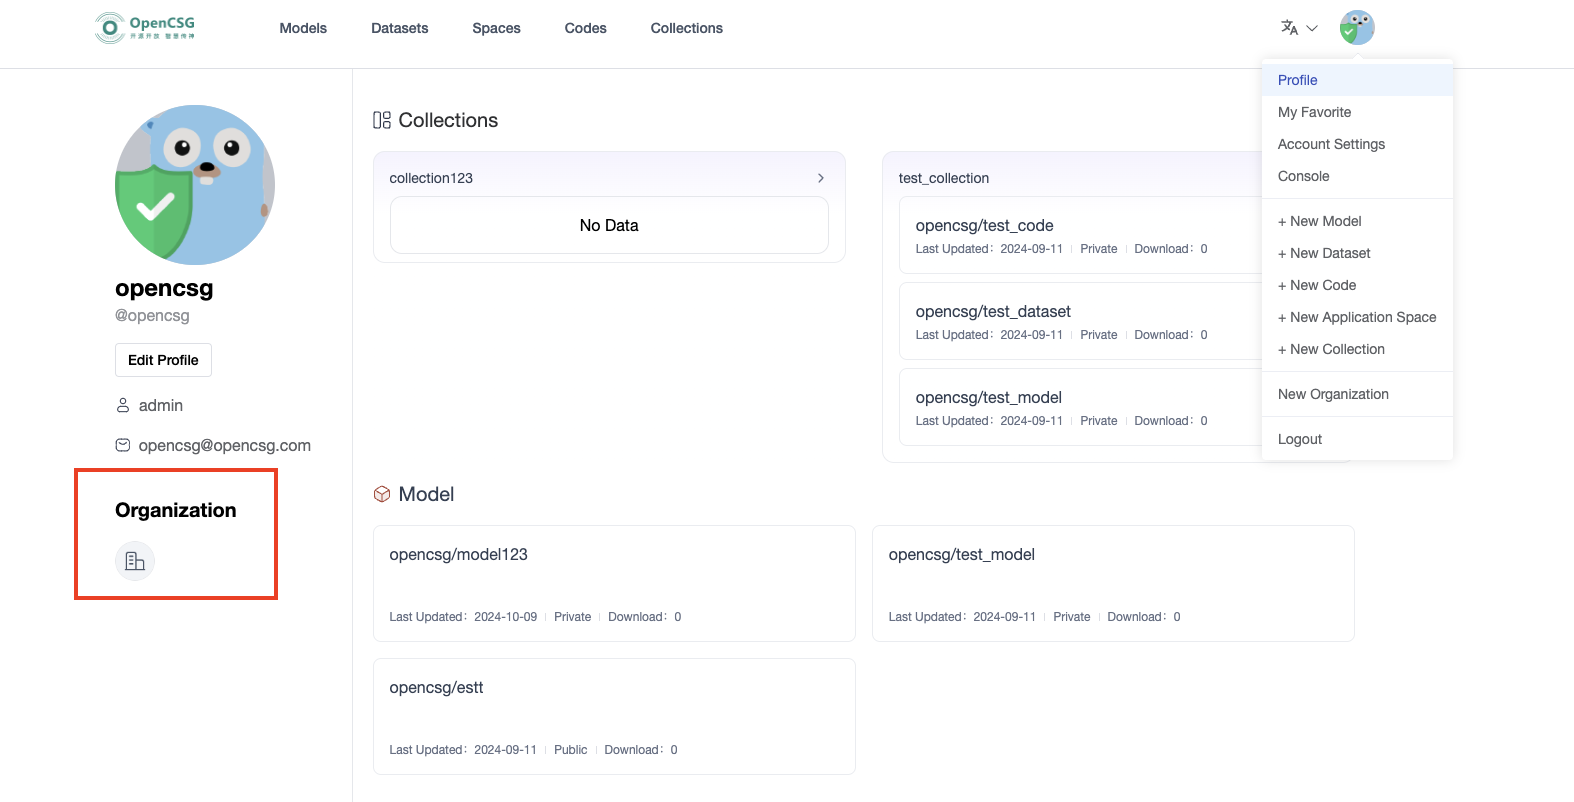
Login CSGHub, click on Profile in the top right corner. Then you can find the organization you have joined on the left navigation bar, and click on it to view the details of the organization.
Edit Organize Information
On the organization Details page, you can view the organization's model, dataset, code, and space.
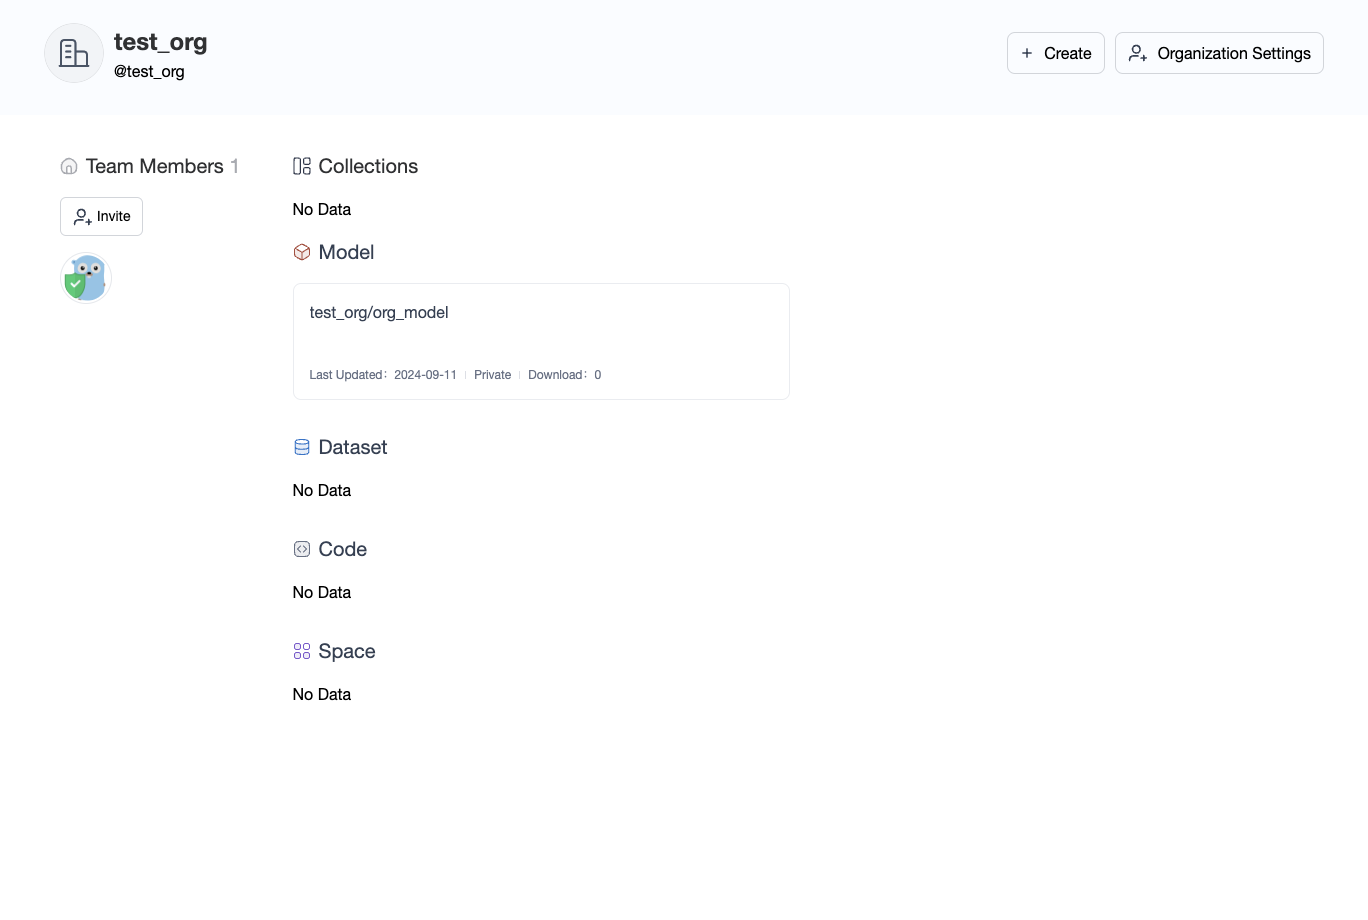
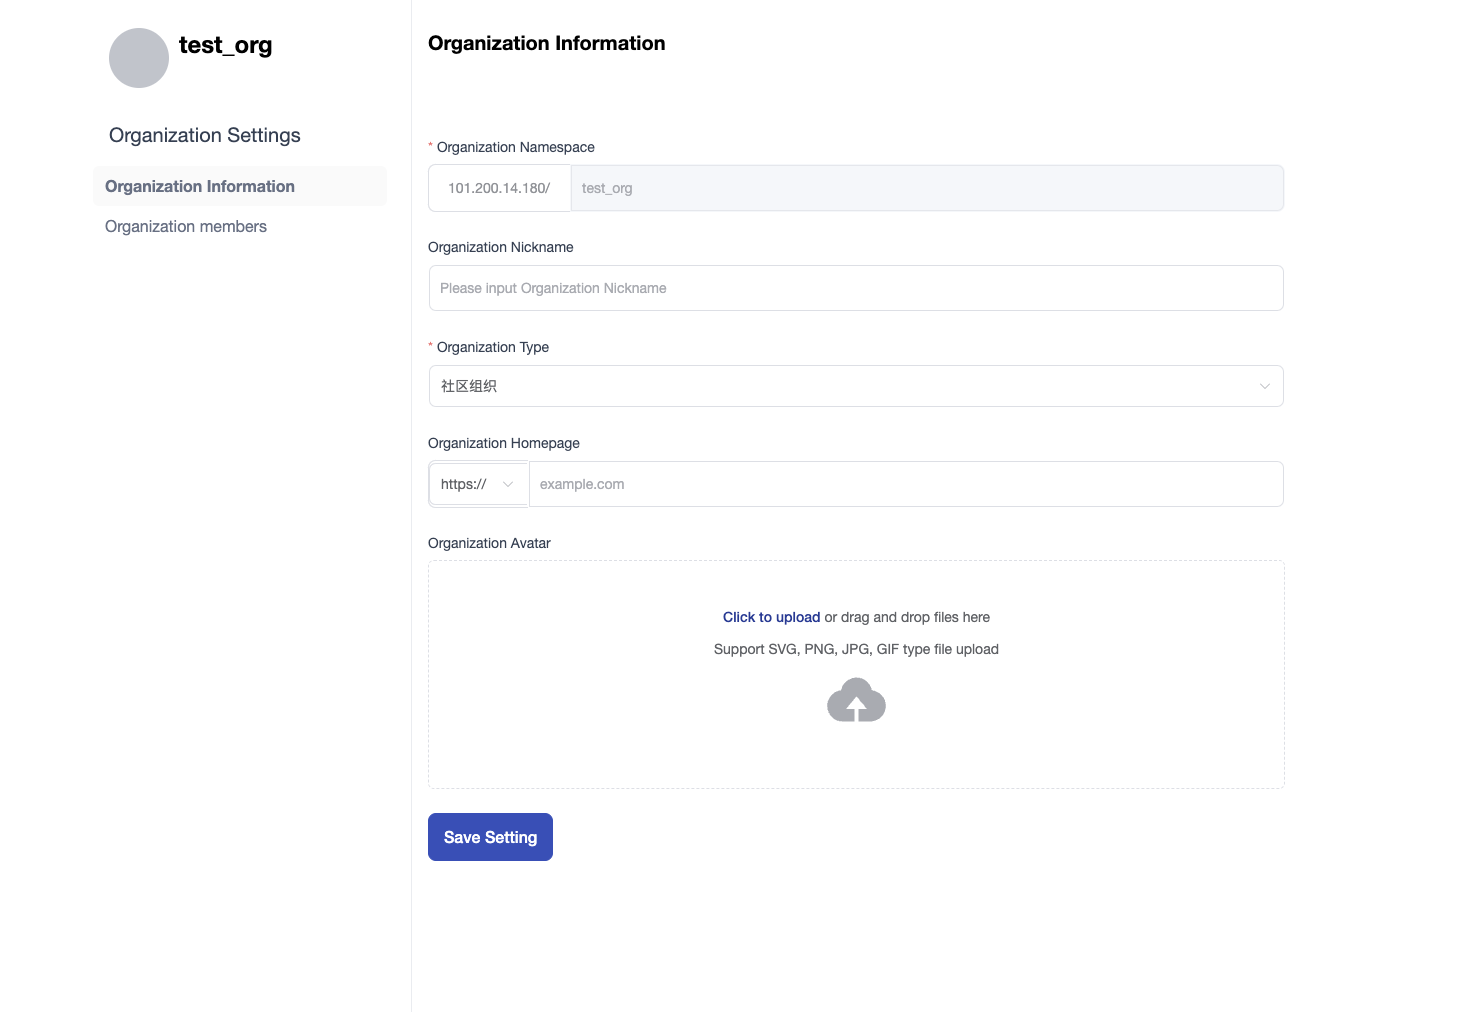
Click Organization Settings to enter the organization Settings page. You can edit the basic information of the organization, invite/delete organization members, and modify the authorization of organization members.
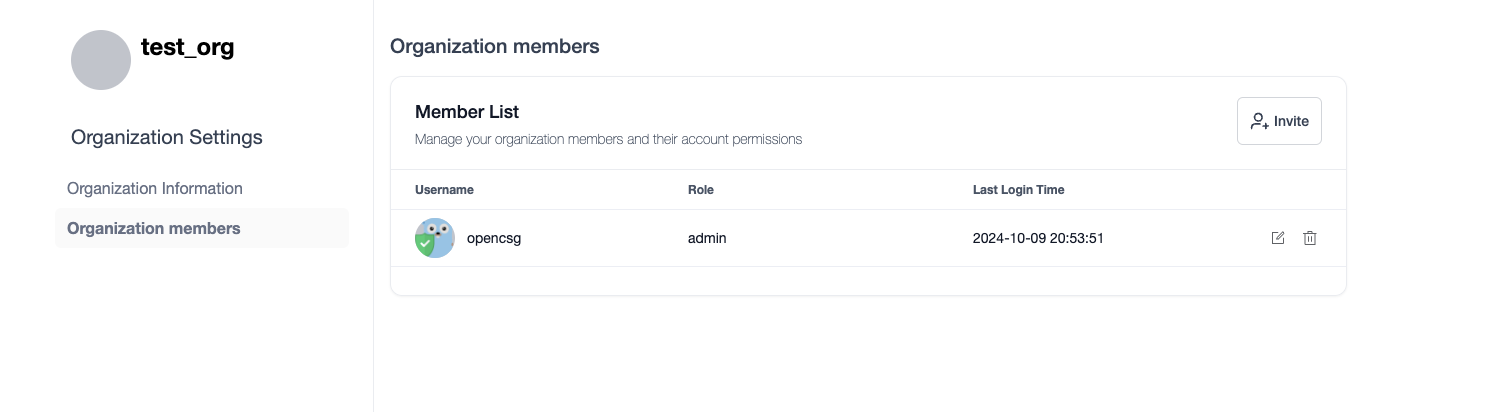
Access control in organizations
Members of organizations can have three different roles: read, write, or admin:
-
Read: read-only access to the Organization’s repos and metadata/settings (eg, the Organization’s profile, members list, etc).
-
Write: write rights to all the Organization’s repos. Users can create, delete repo, edit and delete files from the browser editor and push content with git.
-
Admin: in addition to write rights on repos, admin members can update the Organization’s profile, and manage Organization members.
Transfer Assets to Organization
CSGHub supports transferring personal repository assets directly to an organization you belong to for centralized management and team collaboration. Supported asset types include: Models, Datasets, Code Repositories, MCPs, and Skills.
Transfer Steps
- Navigate to the personal repository page you want to transfer, and click the "Settings" tab in the upper right area.
- Scroll to the "Transfer Repository to Organization" section.
- Select the target organization from the dropdown list (only organizations you have joined with appropriate permissions will be displayed).
- Enter the current repository name to confirm, then click the "Confirm Transfer" button.
Post-Transfer Changes & Permissions
- Ownership Transfer: The repository namespace and ownership will change from the individual user to the target organization.
- Permission Inheritance: Organization members automatically gain corresponding collaborative access (Read, Write, Admin) based on their organizational roles.
- Git Remote Update: The Git clone and access URLs will be updated to reflect the organization's namespace. Please update your local Git remote URL using
git remote set-url.
Hierarchical organizations and effective access
Hierarchical mode requires the applicable edition and deployment configuration. Alongside direct membership, check inherited roles and direct resource grants. A direct-member list alone may not explain every access path. Removing one membership does not necessarily remove access granted through another relationship.
Confirm the target organization and owner before changing access. Administrators should verify the effective role and all grant sources, then test Web, Git/SDK and API access. Key and billing administration permissions must be checked separately.
After transferring a repository, update Git remotes and namespace/repo_id references in scripts, applications and training/deployment configurations. Test existing integrations; do not assume every reference is rewritten. When members leave, review inherited/direct access and shared organization credentials as well as direct membership.
Blocking inheritance
Hierarchical permissions support blocking inheritance. When enabled for a resource, the corresponding organizational inheritance path no longer grants access. Members who still need access should have appropriate direct grants.
Blocking inheritance does not automatically revoke existing direct grants or replace public/private visibility settings. Check each source of access and verify the result using authorized and unauthorized accounts.